Travel: An Overview of Snaefellnes National Park on the West Coast of Iceland

Snaefellsnes National Park is a beautiful, secluded area on the western coast of Iceland, only two and a half hours away from Reykjavik. It was voted one of the most romantic areas to get away in Iceland, and is the perfect place for both hiking in the summer and Northern light viewing in the winter. We stayed two days in this area and I absolutely fell in love. I wish we could have stayed an extra day in order to explore more of this region, but we were short on time in general. There are many things to see in this national park, and some of the most iconic images come from this area. The experience is unparalleled by other national parks we have visited, coupled with the seclusion and moody weather (even mid-summer!). Here, I will highlight a few sights but to be honest, none of these photographs do it justice and you really have to go for yourself to believe it.

Note: the sights are listed in order if you drive around the national park counter-clockwise, which is the direction that you approach it from Reykjavik (the south). The best way to get to the Snaefellsnes area (and all around Iceland) is by renting a car or campervan. We rented a car from Hertz which had the best deal at the time. Just a side note, there is plenty of gravel roads and F-roads in Iceland so you want to rent an F-road approved car if you want to reach the most remote of places. Also, we got car insurance for peace of mind since flying gravel is a common occurrence and we weren’t willing to risk car dents and broken windshields.

Related Posts:

Gerduberg Cliffs

A wall of columns make up this famous cliff.

These cliffs are encountered on the way to Snaefellsness National Park via a tiny road splitting from the main highway to the right. Parking wasn’t an issue as this place is usually deserted, allowing you to revel peacefully at its glory. Evenly spaced, dark grey basalt columns made from lava rock line the cliff walls and have baffled scientists for many years. It isn’t so much the fact that the columns extend for miles but rather, the fact that the evenness in width of each column makes it seem as if this natural beauty was carved by hand. The explanation comes from the way in which the lave rock must have cooled evenly. Small indentations in the grass show a path by which you can climb to the top of the cliffs to get a better view of the valley below.

Ytri Tunga Beach

This beach is comically famous in island as it is the only yellow sand beach present. To which Mike replied, “So like every beach in California?!” I suppose to an islander who is used to black sand beaches, this is a sight to be seen. It is still worth a visit as this is the stomping grounds for different breeds of seals. We visited during golden hour and the seals were playing in the water, bobbing their heads along as Mike and I climbed rocks to see them. Although we were originally unsure whether the “sameness” of this beach to one you would find in sunny San Diego is worth the drive, I was pleasantly surprised at how much we enjoyed our sunset there. We must have watched the seals for an hour, before heading off to dinner.

Budakirkja

Budakirkja set against the mountains in Snaefellsnes National Park.

This black church is similar to many churches in island, so if you’ve already seen one, there is no need to pull off the side of the road to see this one. However, it does mark the start of an eight-hour hiking trail that I wish I was able to do. It is hardly mentioned in the blogs online or in travel books, but it travels from Hotel Budhir to Hellnar. We did end up doing a portion of it, hiking from Anastarpi to Hellnar, but when we return to this region (which we surely will!), I would like to set aside the proper time to do the hike that starts from this church.

A bit of a ways at the beginning of the hidden trail. You can see the worn in grass which marks the path for the hike. All you need to do is walk away from the church towards the ocean.

Bjarnafoss

Such a beautiful waterfall. I can only imagine how much stronger it would be in the Spring.

This grand waterfall is so close to the road that you can see it on the road. The sign to the right of the road is small and easy to miss, but it is definitely turning back around for. There is a short hike that gets you closer to the falls, but not right up to the tippy top. Pro advice: a tiny picnic area hidden among the trees at the base of the waterfall makes this a great place to eat lunch.

The trail Mike is standing on leads to a hidden picnic table behind the trees.

Anastarpi

Bird-watching from the Cliff Viewpoint.

I’ve written about what can be found in Anastarpi in my previous post highlighting the hike from Anastarpi to Hellnar. This tiny town is a great place for bird-watching from the Cliff Viewpoint. It also has the famous Bdar Saga Statue that was built from rocks and towers over the town. You can climb the stone bridge and take a photograph that makes you look like you are high-up in the air, too. And I wrote in that post about the pizza we had for lunch, which I totally recommend. If you have a few days in the national park, I would really recommend hiking from here to Hellnar, as it is a short 1-hour trek and would break up the site-seeing quite nicely.

Bdar Saga Statue looking over the town.

Londrangar Viewpoint

Snaefellsnes is a bird-watcher’s paradise. There is no shortage of cliff areas to watch birds from.

There are many viewpoints along the highway running around Snaefellsness National Park. This one is just a few steps from the lot. It isn’t much different from the bird-watching that can be found in Anastarpi, but the rock formation was sure worth the two-minute detour.

Vatnshellir Cave

The entrance to the cave, although you must take a tour to see inside.

The Vatnshellir Cave is an 8,000 year old lava tube created during a nearby crater’s volcanic eruption. As the lava flowed down a hill onto the lava river, it cooled on the surface as the lava river continued to drain out, thus creating a roof-top over the existing cave. One company does tour guides for the cave and they are the only ones with a permit to enter. That means that you need to do a tour with a guide to see the cave. We decided not to join the tour as we had many other sites on our list. It doesn’t seemed to be booked in advance, which is good, as we saw cars pulling up and signing up for the next tour. You do need to wear proper gear which they provide (such as a helmet), and they ran 45-minute tours every hour at the price of 3500 ISK per adult.

Djupalonssandur Beach

The view of the beach from the top. If you look closely, you can see the ship-wreck remains – bright orange bits of rusting copper.

This beach was another area in which I sadly did not set aside enough time for. I was expecting nothing more than a black sand beach, but to my surprise, there were multiple hiking trails to take from the car park and this beach actually spans a large area. We did do one of the shorter hikes which took us down to the black rock beach, where the remains of a ship wreck can still be seen. To the right of the beach are steps that leads one to a small pool where previous settlers (mostly sea people) had to walk to to get access to drinkable water. There were two other hikes that I really wanted to see, each of which took 1-2 and 3-4 hours respectively. I will definitely be back here to explore! I think it would be best to set aside a half-day to see this beach at leisure.

The hike to the left of the beach took us to this secluded pool where sea travelers had to go to get drinking water.

Saxholar Crater

The Saxholar Crater is nothing but a huge hole in the ground that is viewable after climbing a surmountable number of steps. The cardio work was fun, don’t get me wrong, but the view was anti-climactic and honestly not worth the climb (unless you’ve never seen a crater before?). It is a five-minute detour from the road, if you just want to see it. But Iceland had so many other things to see!

Svortuloft Lighthouse

This was definitely not worth driving to as it required a 1 hour driving detour from the main road on a gravelly path (which meant a 2 hour detour total) just to see a lighthouse. There was, however, cool signs at the end that gave a bit of history about how the sea travelers who landed in this part of Iceland survived. Some of the old dwellings are still visible as mounds in the soil, and there is a scary looking well that you can look at. Mike was brave enough to walk into it, but it was too claustrophobic for me to even try. To be fair, we were coming to the end of our very long day of sight-seeing and I was getting cantankerous from the hunger pains signaling the need for dinner, and soon … so there’s that.

Mike bravely entering the under-ground well.

Kirkjufellsfoss

This waterfall and the background mountain reminds me of Mount Crumpit from Who-ville where The Grinch lived. It is so fairytale like that I wouldn’t believe it was a real place if I didn’t see it myself. The fall itself isn’t as grand as it seems from the photographs but the background can’t be beat on a clear day (luckily, it did clear up in the latter half of the afternoon). There is a lot on the side of the road and it is a minute’s walk from the car park to the fall itself. I had to open this entire post with this photograph, although here is another view of it without the mountain in the background from the base of the fall. Not as grand, right? It is one of the most famous sites for Google stock photos, and looks even prettier (or so it appears in other people’s pictures) with the Northern Lights in the background.

If you enjoyed this post, subscribe to my newsletter to receive all things travel! Notifications of newly published travel guides, itineraries and tips will be delivered directly to your inbox.

Travel: Hiking in Landmannalaugar, A Remote Gem in Iceland

Landmannalaugar is a space shaped from fairytales. The silica-rich mountains of the area are made of rhyolite, a type of volcanic rock, and streaked with the colors of a rainbow – red, blue, pink, green and yellow. It was historically a geothermal retreat for settlers, and the little pool at the base of the mountain was named The People’s Pool. Today, it still remains a bath for adventurers wishing to rest tired limbs after a long day of hiking. It’s no wonder this place is known as Iceland’s Pearl of the Highlands.

How to Get to Landmannalaugar

Starkly contrasted against a black lava field called Laugahraun, this gem of a place is tucked away in the heart of Fjallaback Nature Reserve and takes about two and a half hours to get to from the closest town (three hours if you’re coming from Reykjavik). We stayed at Fludir near the Golden Circle, and took the Northern Route, which according to the reviews was the easiest.

The first hour of the drive was on paved road, and I would recommend filling up the gas tank at Fludir or Arnes, as there will be no gas stations for miles around. After an hour, the road gradually changes to gravel, and then to F-Roads. You need to make sure you have an F-Road allowed car when you rent one at the airport. The F-roads were rough and really slowed down our driving. Some people were zooming along in their trucks, but even they were bouncing past the rocky terrain. After about an hour of F-Roads, the last stretch was on gravel, which was much easier to manage. Thirty minutes more until we got to the first parking lot. There are technically two parking lots but to get to the second, you must cross a river. We came on a summer day and the river tide was low. Still, we chose to park in the first lot since the walk to the second only took five minutes. We didn’t want to risk ruining our rental car. I have heard that getting to Landmannalaugar from the North is the only way to avoid a river crossing.

The river crossing on a summer day in July. Low tide!

Despite this, it is worth the drive, even for a day trip. If you wish to make the most out of your drive, there is a campsite at the base of the mountains. Or better yet, Landmannalaugar is the start of an epic, three-day trek called Laugavegur Trek, which is rated the number one multi-day hike option in Iceland.

The Campsite at Landmannalaugar

There is a campground at Landmannalaugar and a decent number of people were posted up. Since there are multiple day-hikes in the area, I assume it was common for people to stay overnight. The campsite has a stand where you can buy snacks and supplies. At this same stand, you’ll need to purchase a wrist band to use the facilities. Since we were hiking all day (and chugging water on those steep ascents), we did pay for a restroom pass. It became useful when we changed out of our hiking gear and into our bathing suits for the People’s Pool later on. It isn’t necessary to purchase anything ahead of time or to reserve a camping spot. We saw a number of people walk up to the window and ask to buy a spot for the night. Nomad living and campervan life is common in Iceland, so most of the people just post up where they please. I can very much understand why Landmannalaugar is one of those spots. To note, there are also beds to be rented out in two huts behind the supply store (if camping isn’t your thing). A peek into the building windows indicated that there was a working kitchen and common room with electricity and running water. I would look into how to reserve these huts ahead of time.

The campsite from far away. The huts can also be seen from here.

Laugahraun Lava Fields

We started our hikes behind the aforementioned huts. Into the lava fields we went. There was an initial hilly climb that took less than a few minutes to complete. After that, it was an easy stroll for half of the loop trail. The best thing about this area is that all trails are marked by color-coded posts. The lava fields were demarcated with orange/green/white posts – since they are also the start of two other trails.

The Lava Fields.

There was a lot to be seen in the lava fields. Crazy rock formations and a stunning sea of black volcanic rock surrounded you completely. It felt like being on Mars, or being the lone survivor after the world’s doom. Eventually, you will come to a clearing that gives you a great view of the beautifully colored mountains. The view from the bottom is just as amazing as the view from the top, so I would stop to gander. Halfway around the loop trail is the opportunity to veer right. Tall grass beckoned us towards the Brenneinsteida Loop (green posts) and we hugged the mountain side going in a counter-clockwise direction. It seemed that clock-wise was the popular decision, but I do think counter-clockwise was the easier path since the steepest of hills were climbed upwards rather than downwards. This isn’t to say that sliding down gravelly hills is impossible, but I would prefer to do steep descents with walking sticks which I didn’t have at hand on that day. In the end, the counter-clockwise decision on our part was pure luck, and like most things in our life, we do have a knack for going against the grain.

Black rock juxtaposed against white snow.
The valley view before you leave Lagauhraun to chase Brenneinsteida.

Brenneinsteida Loop

From the lava fields, you hug a grassy trail around the mountain’s base. Even in mid July, there was a patch of melting snow on the back side of the mountain where the light doesn’t hit it as much. Hiking boots are a must for this trail, although hiking poles are not. The melting snow is nothing but a short patch and if you’d like to stray from the trail a bit, you could cross the tiny stream and walk in the grass. From here you can cross the plain and there is a trail that goes into the mountains on the right. However, we hugged the mountain on the left until we reached a very steep hillside for ascent. It was incredibly brutal, but the whole way up, I was thanking the heavens that I was going uphill instead of downhill. My fear was that thee would be a similar hill on the other side of the mountain, but luckily it was more gradual and easier to descend. Like I said, clock-wise is the way to go.

The melting snow mudpile you’ve got to maneuver around.

After the steep ascent that took no more than 10 minutes for us to climb, there is a series of upward slopes with areas of flat terrain in between, giving us a good number of breaks. I found myself constantly stopping and turning around, as well as looking to my sides. There was beauty to be seen everywhere and I have never seen such magical colors come out of the Earth before. In geothermal pools, yes. But not from mountains!

Mikey taking in the views from the top.

At the very top of the mountain, there is a view of the lava fields below, and of Blahnukur Trail (Blue Mountain). It was breath-taking. If you have it in you, you can continue this loop to the Blahnukur Trail. A few hikers at the top mentioned that there is a river crossing required (maybe up to the knees, you must remove your shoes, and the glacial water is freezing cold!) and a scramble up some scree on the initial hill. (If you were doing the hike clock-wise, the scree scramble would be at the end of Blahnukur Trail, on the way down, which in my opinion is worse). Other than those two things, the trail was described by others as fairly moderate and straight-forward. The mountain man giving us advice had a 6-month old baby strapped to his chest – which either says something about his abilities at scrambling, or the level of difficulty of the hike. We decided it was the former, and skipped Blahnukur due to the fact that we still had half of the lava fields to do. If we were camping overnight, I may have done it on a different day.

The view of Blahnakur Mountain from the peak of Brenneinsteida Trail. The wall of scree is visible, and the river crossing is right in front of the lake, hidden by the hill in the foreground. The trail wraps around the mountain side and looks moderate after the steep start.

The People’s Pool

After we made our way through the second half of the lava fields (the latter portion has more rocky terrain and isn’t as easy as the first half), we decided to take a dip in the ever-famous People’s Pool. We changed in the restrooms and walked the plank over to the natural, geothermally heated pond. It is not as nice as the Reykjadalur Hot Springs and since it’s more of a pool rather than a river, you have to be okay with stagnant water. Mossy greens float in the water and it isn’t clear in color. Rocks cover the bottom of the pool, so do bring sandals if you’ve got tender feet like me. I was okay wading through the rocks but it did hurt and it took me a while to meander to the warm part of the pool.

There is a changing deck with stairs leading into the water. It’s a bit frigid until you get to the part of the pool where the running water enters it – these are the sources of geothermal heat. Which is a great spot to meet other travelers and converse about the beauty of Iceland. Sometimes, it does require a bit of moving around, as areas tend to get too hot, depending on the rate of water flow. It was exactly what our muscles needed! I was even okay with smelling like geothermal water (rotten eggs) on the entire car ride home!

The heated areas are easy to spot.

This is definitely one of our top five experiences in Iceland. I know that it’s far from Reykjavik but it’s well worth the drive. Next time we’re back, we’ll save time for a three-day trek down the Laugavegur trail, perhaps even connecting to Fimmvorduhals Trail for a total of five days. This area is not to be missed!

If you enjoyed this post, subscribe to my newsletter to receive all things travel! Notifications of newly published travel guides, itineraries and tips will be delivered directly to your inbox.

Travel: Hiking Anastarpi to Hellnar, Iceland

This post may contain affiliate links. Please see my disclosure to learn more.

Anastarpi and Hellnar are tiny towns located in Snaefellsnes National Park on the western coast of Iceland. When I say tiny towns, I really do mean a few homes, at best. Remotely located on the coastline, there are a lot of great views to be had on the cliffs, which are teaming with seabirds, jagged rock, and strands of beach.

SIDE NOTE: There is a hike that extends all the way from Hotel Budir to Hellnar (which no one EVER talks about) that we did not get to add to our itinerary (because we simply did not know about it before hand and did not allocate enough time) but it tops my bucket list for our return to Iceland. Even now, as I sit in the comforts of my home trying to google information about the hike through Budahraun Natural Reserve, I cannot glean any information. The only evidence of such a hike is an AllTrails suggestion. According to my travel notes, it is a 6-8 hour trek that begins at Hotel Budir (you will see a sign plus the trailhead starts after Budakirkja Church). Thankfully, I took a photograph of the sign.

There will be a river crossing but if you want to avoid getting wet, you can cross it on the road above the trail. The tail end of this long hike is the one I will write about today, which spans from Anastarpia to Hellnar.

Hiking Anastarpi to Hellnar

It takes about one hour to hike from Anastarpi to Hellnar. When I say the towns are tiny, I really do mean tiny. I can count on my fingers and toes the number of buildings present in Anastarpi. There are less in Hellnar. The hike is easy, and goes along the coastline. We drove to Anastarpi around 10am and parked at a lot in front of the restaurant. Tour buses frequently park here so I would come earlier rather than later to snag a spot. I would suggest walking around the area first before starting this hike.

At Anastarpi, there is this giant stone statue called Bdar Saga. It is worth looking at and reading the sign.

From far away, he looks like a guardian standing over the city for protection.

Or a lonesome stranger sitting in nature.

There are also cliffs from which to birdwatch.

My favorite view was this stone bridge.

To the east, there is a trail that I am sure connects to the hike originating at Hotel Budir. Head towards the lake and onwards if you wish to go that way.

The view of Anastarpi. Beautiful green grass, colorful buildings, a blue lake, and birds everywhere. This is the perfect bird watching place!

The hike to Hellnar is to the west. Once you’ve had a chance to look around, I would start walking west and you will approach a gate that’s meant to stay closed. This is the mark of the trailhead. Don’t let the gate deter you, it is open.

The trail is mostly through volcanic rock terrain. Hiking boots are not a necessity, but if you are curious, this is what I wear on every hike when I travel:

Mikey moving along the trail.
A boy looks into a hidden cave.
When you get to this boardwalk, you know you are approaching Hellnar.

At the end of the trail, once you reach Hellnar, there is a cute cafe situated on the coastline. It isn’t fancy, by any means, which adds to its charm. I highly recommend stopping here to grap a cuppa and a snack. They make really good waffles. On a rainy or snowy day, you can cozy up inside, but we preferred the outdoor views, even with the overcast weather.

They were generous with the house-made whipped cream.
On the way back, we were surprised to find this brightly colored home. Which goes to show that turning around to see from whence you came is always a good idea.

We headed back to Anastarpi after our coffee pick-me-up and arrived shortly after lunch-time. There is a pizza place and a burger joint. I highly recommend the pizza place, although it is a bit pricier than the burger spot across the street. But the pizza was the perfect lunch after our hike!

So how do I rate this hike? The hike was an easy one with mild views. It was not my favorite trek but it is good for children and older folks who wish to do a bit of jaunting while in Snaefellsnes National Park. I think I would have enjoyed it more if I had connected to it from Hotel Budir. As I said before, we’ll save that for next time!

If you enjoyed this post, subscribe to my newsletter to receive all things travel! Notifications of newly published travel guides, itineraries and tips will be delivered directly to your inbox.

Travel: Hiking Reykjadalur Valley in Iceland and Bathing in its Geothermal Hot Spring River

This post may contain affiliate links. Please see my disclosure to learn more.

Of all the day hikes we did while visiting Iceland, the hike in Reykjadalur Valley was by far our favorite. Just a stone’s throw away from Reykjavik, this valley is full of beautiful scenery, geothermal hot springs, mud pools, and best of all, a hot river that you can bathe in at the center of the valley mid-hike. I would highly recommend relaxing your muscles in the running river, as it is a serene and beautiful spot. We almost skipped it but after high praises from my sister, who dipped into the river a few days prior, we rolled up our leggings and shorts and waded in. We had a great time and call it one of the best experiences on our Iceland trip.

You can hire a tour guide to explore this area on horse (Iceland does have the cutest horses around, with their squat legs and beautiful flowing hair) but I prefer hiking on foot. My sister did the tour with the horses and it was an all-day trip, whereas my husband and I hiked Reykjadalur Valley on foot and it took about 3-4 hours. If you’d like to learn more about the hike to Reykjadalur Hot Springs, feel free to read on.

Spoiler alert: There’s a number of photographs in this post that may spoil the views. This may not be the best post for hikers who prefer to be surprised by the scenery. I, for one, like to know ahead of time.

This is a view of the valley on the main freeway as you approach from Reykjavik. From far away, you can see the geothermal activity of the area in the form of smoke rising from the hills.

Reykjadalur is located fairly close to the main city of Iceland, Reykjavik. You just hop onto the 1 Freeway (also known as Ring Road) and head southeast for 40 minutes. You can see the valley on the freeway and before you reach Hveragerdi (the closest town), there is a turnout with a map of southwest Iceland. From this turnout, you will see smoke rising from the hills. Know that you are not far away. You must turn left towards the mountains when you reach Hveragerdi. The roads are well paved and there are no F-roads to encounter along the way (meaning you can reach the trailhead with a regular car). A large parking lot with a cute coffee shop marks the trailhead. There was plenty of parking space when we went, despite the late start to our day.

The beginning of the trail.

From the parking lot, you will see a well-kept gravel trail that begins the journey into the valley. If I had a do-over, I would start this hike earlier in the morning, so as to return for lunch at the cute cafe near the parking lot. In reality, we slept in after some major jet-lag, and started our hike at noon. As you can tell from the photograph, Iceland stays relatively overcast, even in July. That doesn’t mean you should skip the sun-screen. I would pack a light rain jacket if you have a problem getting wet, or a light fleece jacket over a tanktop. I like to wear layers when I hike for easy shedding. It was fairly warm that day, so I didn’t need both. For us, hiking boots are a must, although this trail is doable in regular running shoes as well. To get an idea, these are the things I wore on this day.

What to Wear When Hiking Reykjavik Hot Springs

Things to Bring

When we went, there were no crowds. People were spaced out enough and as you get deeper into the valley, you see fewer and fewer hikers.

On the day that we went, there were few crowds. I was happy to be hiking with less people around. As you get deeper into the valley, you will notice that the hikers spread out even more. The winding trail allows for bouts of isolation, so that you can enjoy the scenery without a bother. Mike and I prefer to hike fairly alone, and do most of our deepest talks during the most strenuous of hikes, which also happens to be the lesser crowded ones. Check out the photo below to see what I mean.

A lone hiker in front of us, and nature all around.

I would rate this hike as easy to moderate. Don’t let the steep looking inclines dissuade you from trying this one out. There is a steep hill at the very beginning but it is fairly flat towards the middle. Plus, you know what steep hills mean – easy descents! We hiked this trail without walking sticks, and the path was not so gravelly that we were slipping and sliding. Of course, our hiking boots really helped with the solid footing. To give you an idea of the difficulty level, we saw 3-5 year olds doing the hike with their parents. And there is only one patch of the hike that still had ice in July. It was fairly short (twenty steps total?) and was on a flat surface.

A word of caution: Don’t stray too far from the trail. This place is teeming with geothermal activity. Mud pools could create soft pockets of dirt, which a boot can easily depress into. The last thing you want is a burned leg. Stay away from the steaming areas, and I would think twice about touching running water. The hot spring river is good to swim in, but I can’t speak for other areas. Other than that, enjoy the views!

Don’t get too close to these hot vents. They’ve turned black for good reason!
A happy giant looking down on us from the rocks.
Sheep grazing in the grass, unperturbed.
The views undulated between grassy knolls, black lava rock, and bright blue running streams. The overcast day and the white smoke rising from the brown mountains was really a sight to see!
You can see the steaming river just around the bend.
When you get to this bridge and a horse pen, you know that you aren’t too far away.

A bridge and horse pen demarcates your proximity to the running river. You cannot miss it, as people are most likely wading in the waters. There are changing stalls without any doors. If we knew we were going to get into the water, we would have brought a towel and swim suit to switch into. As is customary in Europe, nudity is never a problem and you’ll see a number of people changing without the typical modesty you would see in America. You can always hide behind a stall and wrap your towel around you if that makes you uncomfortable. On either side of the river are stairs by which to enter the water. We spontaneously did it and are so glad we did. We stayed for an hour, and never wanted to leave. It was the perfect break before hiking back down to the parking lot.

Side note: The river is not the end-all-be-all, even though it is where we turned around. The trail continues past the river and into the mountains. It is a loop that starts just past the river and returns to the river. Continuing on would add an hour to your hike. Then you return the way you came.

It is worth stopping by the shop and cafe when you reach the car park. There were delightful cakes in the case, and sandwiches and coffee to be had. They also have clean restrooms and you can refill your water bottles at the restroom sinks. Lastly, there is a tiny shop where you can buy souvenirs or hiking necessities (such as a tiny towel, or a swimsuit).

The valley and all it’s pretty terrain.

This was our favorite hike in Iceland. It was also our favorite geothermal spot (better than the touristy Blue Lagoon!). We are introverted travelers and we prefer the romantic views and more isolated spots where we can hear our inner thoughts, and discuss them too! Even when we were in the river, there was enough space for everyone to get a stairwell to themselves. This place never felt crowded or overwhelming, but rather peaceful and serene, something we like over the tourist scene. I don’t think it’s worth getting a tour guide, as that would require you to see this place on their time. I recommend doing this hike on your own, and taking it in without rushing through it. It would probably take a half day to do.

If you enjoyed this post, subscribe to my newsletter to receive all things travel! Notifications of newly published travel guides, itineraries and tips will be delivered directly to your inbox.

Travel: A Weekend in Telluride, CO

A weekend in Telluride, Colorado was the right prescription to combat my fast-paced California life. Nestled in a valley surrounded by snow-capped mountains (in June!), this secluded town is almost two hours away from the nearest Southwest-serving airport (Mike and I are companion pass holders and we use our Southwest card to travel around the United States for FREE!) and is a stand-alone vacation spot so that, once there, you can nix the rental car along with all other obligations and just settle into the present tense. In fact, since there is no need to leave this town (like ever!), I would actually recommend taking the shuttle (at $75 per person) from the airport to Telluride. It’s less stress, less hassle, and if you’re staying a while, less dollars.

Telluride is the perfect place if you like slow-living. There is fantastic food and coffee to be had, as well as a number of shops downtown. I would recommend swinging by the book store and purchasing a paperback to read on the patio of Ghost Town or Coffee Cowboy. If you prefer to write, my friend and I bought paperback journals and spent an afternoon writing whilst sipping smoothies. Natural juices translated into creative ones in real time. There are also many local events, such as live music on the green or a Farmer’s Market that takes place for a majority of their Fridays. On the weekend, you can join the community clean-up crew to keep the area looking pristine – and to pay back Mother Nature for all the good she provides.

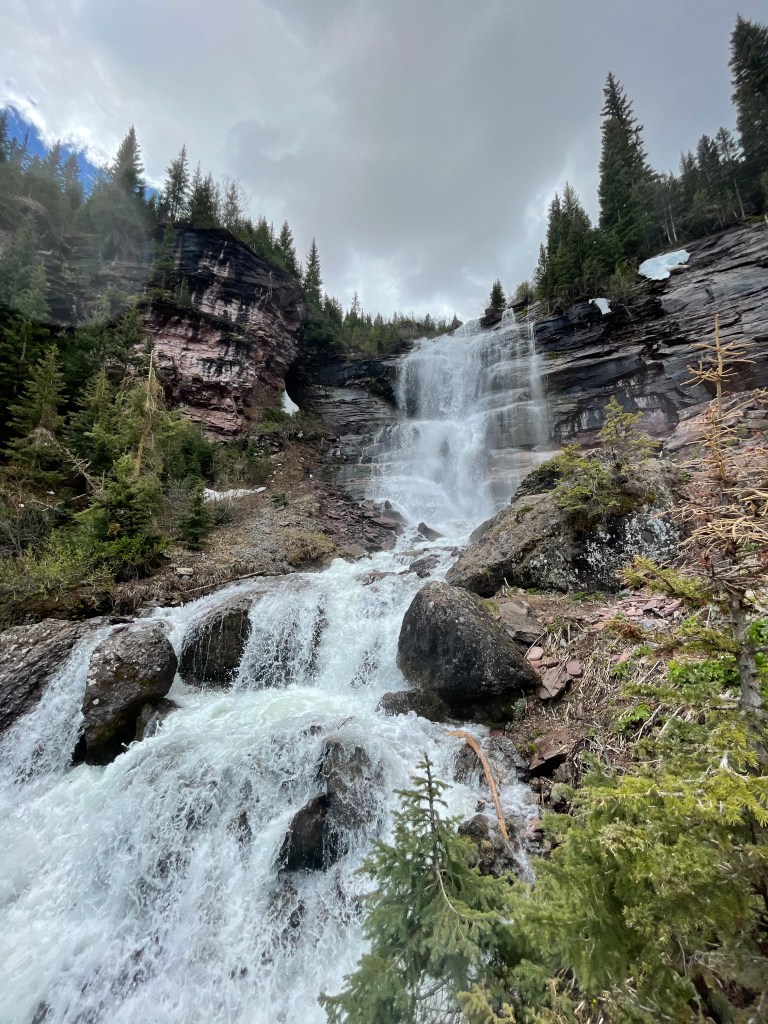
The vibe of Telluride is adventure-laden. The streets are teeming with dogs and active pet-owners who have most likely checked off a 3-mile hike by the time you wake at 9am. Patagonia gear, trail runners, and Prana shorts abound in this outdoor-loving getaway of a town. Most trailheads begin in town, and the trails are well-kept and demarcated clearly, as well as avidly used by the locals. Many waterfalls can be seen due to the melting snow caps, and some you can walk right up to them and revel in their misty glory. Shall you choose, rivers for crossing are also present – so feel free to slip off those Tevas and ground yourself in ice-cold goodness. Telluride also has the only free gondola in North America, which will take you to trailheads at the top of the mountain, without the need to slave away to the halfway point. For those with kids, why not take the Gondola up and hike with them down towards town? You’ll still get the view, without the tantrum.

Here are a few highlights from our recent Telluride trip.

Ghost Town Coffee

A great spot to have breakfast or refresh in the afternoon. We went back for smoothies twice (may I recommend the coconut milk in the Purple Smoothie or the house-made cashew milk in their green smoothie?). They also make great coffee, and have an intimate gathering area outdoors for your friends and family.

Cowboy Coffee

The pitstop we made three out of three days. It’s a tiny trailer stationed next to a Greek restaurant serving great coffee and breakfast burritos. Pro tip: The day-old burritos are half-price, so take them to go and reheat in your AirBNB for an easy time. Also, they’ve got a stash of spices sitting on the counter, and my tumeric-infused coffee really got me through those rainy Telluride afternoons. The clouds roll in around 2pm from the surrounding mountain giving the town a daily shower. No wonder it’s so green!

The Butcher and the Baker

Apparently this is the busiest breakfast situation on weekends. The line went around the corner, and there are no reservations. I would recommend swinging by during the weekday if you want to avoid waiting a while. I got the cheddar croissant and coffee. An honest baker’s opinion? I would go with an actual breakfast meal rather than a pastry and bring coffee from the other two places mentioned above. What I ordered was okay, but what the waiters were bringing to other tables looked way better!!

Brown Dog Pizza

My number one recommendation when staying at Telluride. This place gets busy between the hours of 6pm and 8pm and there is limited seating outside so either plan to come early or take it to go. They have multiple Award winning pizzas and they did not disappoint. You could even request to top the two halves differently. We were able to try two of their Award winners, and it was DELICIOUS!

New Sheridan Hotel

A historical hotel remodeled into what currently stands, with a great patio area and restaurant for lunch and dinner. Eating here is a bit on the pricier side, but they serve good American fare for those who like lighter and well-prepared meals. The key lime pie is to DIE FOR. I’m biased, of course.

Bear Trail Hike

This trail is a great beginner 5-mile out-and-back hike (2.5 miles each way). The trail is well demarcated and you’ll encounter fields of wildflowers, fallen trees, a few waterfalls in the distance, and a waterfall that you can walk right up to. Trees line the way on either side as the snowy mountains guide you straight ahead. We saw many families and dogs on this hike. It’s very doable, but make sure to embark early and return to town around lunch time to avoid the afternoon rain.

Gondola to Mountain Village

You can take the Gondola to the Mountain Village which is the ski resort at the top of the mountain. The gondola is the only free one of its kind in all of North America. We took it all the way up and then hiked back down into town.

Telluride Trail

You can go up and down this intermediate ski run but we used the Gondola to go up and hiked it back down. As you get closer to town, you see a bird’s eye view of Telluride as well as hear the live music playing on the green. The hill is steep and rocky, so you definitely want to wear footwear with traction – unless you’re okay with slipping and sliding occasionally. The trail is straight-forward and bare since it is a ski run, but the view is hard to beat. Please note in the photo the afternoon clouds rolling in, right on schedule.

Telluride is a well-kept secret, but the travelers we met pay recurring visits. I plan to return, as well. This tiny pocket of slow is really what many of us need right now.

If you enjoyed this post, subscribe to my newsletter to receive all things travel! Notifications of newly published travel guides, itineraries and tips will be delivered directly to your inbox.

How to Travel the World For FREE

This post may contain affiliate links. Please see my disclosure to learn more. 

I am all about optimizing life through “life hacks”, and one of my favorite ways to do that is by traveling the world for free by travel hacking. When Mike and I first got married, our financial planner asked us to prioritize our goals in life and traveling the world made the top of the list. But how were we to do that when I was sinking in my student debt of $575k after going to dental school? Determined to live out our dream while tackling my debt, I fell upon the topic of travel hacking. Since our marriage, we have been to Alaska, Canada, Mexico (4 times!), Oregon (twice!), Washington (twice!), Colorado, Arizona, Germany, Australia, New Zealand (twice!), as well as the Bay Area (5+ times). Out of all of those flights, we only paid for the Germany one due to a sweet deal that landed us in their country for under $500 each (roundtrip), which ended up being cheaper than if we bought the flights in points. In total, we have taken more than a dozen roundtrip national flights and 8 roundtrip international flights since tying the knot. Just this month, we booked a two-week trip to Iceland for Mike’s birthday and paid for the roundtrip United Airlines flights fully in rewards points through Chase Ultimate Rewards. The savings from travel hacking are huge and before we get into why this is crucial to our financial independence plan, let me first give a brief overview on what travel hacking is.

What is travel hacking?

Travel hacking is a way of taking advantage of credit card sign up bonuses and earning tens of thousands of rewards which can then be traded in for flights, hotels, and car rentals. In order to hit reward bonuses, we open one credit card at a time and use it for all of our daily spending, which will always cause us to hit the minimum required spending in order to redeem the bonus. Once we hit the sign-up bonus, we move on to our next credit card.

The key to success lies in opening multiple credit cards and receiving large sign up bonuses. Once you receive the sign up bonus, continuing to use the credit card will earn you very little in rewards points – an inefficient way to earn a free flight. To optimize the strategy, you must move on to the next card.

It takes a lot of organization to keep track of credit cards opened, as well as discipline to not spend haphazardly with your newfound line of credit, but it is very much worth it. I would say that travel hacking is one of the core fundamental principles of the F.I.R.E. community and it has been absolutely instrumental in both fulfilling our dream to travel the world and getting us closer to being debt free.

Why Travel Hacking Brings You Closer to Financial Independence.

Travel hacking is essentially using your every day spending such as grocery buying, paying bills, and other living expenses (that you would end up doing anyway with or without a credit card) to earn you reward points in an efficient manner. It is a great method because it does not require you to spend more money than you normally would.

At the same time, it removes the need for you to budget as much money as a regular person would for travel. For us, personally, travel hacking has saved us over $10,000 in flight tickets. That’s $10,000 that I was able to redirect towards paying down my student debt. It’s $10,000 I didn’t have to earn to maintain my lifestyle, which gave me more freedom to eventually quit the job that didn’t suit me. Imagine what would happen if you placed an extra $10,000 into your Marcus Savings Account. How much closer would that bring you to other goals, such as buying a home?

However, the real kicker in all this is that travel rewards are PRE-TAX dollars. You are never taxed on the travel rewards that you earn, or the flights that you redeem. If you do not travel hack, you are using POST-TAX dollars to pay for your travel adventures. Do you realize how much money you are actually losing? Take my flight example. Let’s say we saved $10,000 even on flights. Let’s assume for simplicity sake that we are in the 25% tax bracket. We would need to earn $13,333 first, then get taxed 25% of that, in order to buy $10,000 worth in flights. Meaning, travel hacking has actually saved us an additional $3k on top of the $10k that technically we never had to earn through our jobs anyway. This is why I really recommend travel hacking to everyone. Even if you don’t have a dream of trotting the globe, you will eventually need to take a flight either for a honeymoon, someone else’s wedding, or taking your kids to visit their dream college across the country. So why not start earning free money today?

How to travel hack?

Travel hacking is simple, easy, and for me, very fun! I first heard about travel hacking on Choose FI even before I became a guest speaker on their podcast. They now have a free course which you can sign up for here. They taught me everything I know and I would recommend reading the course fully before starting your travel hacking journey.

Personally, my top 3 favorite travel rewards cards are:

These are my referral links and I posted them here to try to connect as many people as possible to the best credit cards for travel hacking. If you know someone who loves to travel, especially young college students and new grads who may feel (like we did) that it would be impossible to travel, do share this post with them. You could change their life!

Here are a few posts on where we’ve been thus far:

Here are related posts on how we travel:

Side Note: An alternative way to travel for free is to use the platform Trusted House Sitters. You can pet sit and house sit around the world through this website. I actually once read the story of someone who used Trusted House Sitters as their living situation. They lived wherever a pet needed them. It’s a great way to have a place to stay while traveling in another city. I know that the logistics of constantly moving isn’t for everyone, but I still highly recommend this to all pet lovers who wish to travel on a budget.

Travel: Day Hike from Muir Woods to Stinson Beach

The first weekend of March, we did the 10-mile hike from Muir Woods to Stinson Beach. It was a Friday and the woods was absolutely empty. You have to reserve a parking spot ahead of time and pay for two entrance fees into Muir Woods. The entrance fees were $15 per person and the parking lot fee was another $8.50. You can absolutely do 90% of this hike if you start at Stinson Beach, but just know that you cannot enter Muir Woods without a pass (or well, you risk being stopped and checked for a ticket). To be honest, no one stopped us on the day that we went, but then again, no one was there. It was magical. If you ask me if the fee was worth it, I would give a resounding 100% YES, but only because we literally had the park to ourselves. We arrived at the parking lot and stopped by the restrooms before heading into the woods. The first part of the hike is easy. I recommend taking a left turn at the first bridge and hiking above the woods to begin. You can hike the bottom half of the woods when you return.

If you take my suggestion to start hiking up after the first bridge, you would be up in the treetops walking above the quiet trails below. You’ll reach a dead end eventually, at which point you make a left to continue onto the trail. If you chose to stick to the forest floor, make a left at the fourth bridge and you will end up on the same spot.

The first half of the hike takes you steadily along a wide dirt path underneath the shade of magnificent Redwood trees. The trail is well-maintained and well demarcated. There are some steps, but nothing stressful on the way to Stinson. I must warn you that the way back is much more difficult, as you’d have to climb many consecutive steps returning from the beach. If you aren’t an avid hiker, perhaps doing a one-way trip and catching a lift back to the parking lot is best. We were just fine, but my thighs were a bit sore the next day. Then again, they weren’t sore enough to stop us from going on a 7-mile hike. Enjoy the shade of the trees, the silence underneath the canopies, the soft Earth underneath your boots, the smell of sap and the occasional breeze. Eventually, you will pop up on the hillside and if you’re lucky, it’ll be a charmingly sunny afternoon with blades of green grass lining the hills.

The views from the top of the mountainside are beautiful on a clear day. You can see the Golden Gate bridge, San Francisco, as well as Marin County. You’ll see mountaintops peeking over the ocean. I saw a couple, far out in the distance, hand-in-hand frolicking quite literally down the hillside. I must say, I felt the same way.

Eventually, you will re-enter the trees again, but the second half is different. Less moist, less coverage, more sunlight. Plus, this portion is all down-hill. Don’t let that deceive you though, as the rough part lies in the return journey. But for now, enjoy the branches and tree trunks. They’re kind of fun to look at whether they be stick straight or wavy.

Eventually, you’ll come to a clearing which is the first time you’ll see Stinson Beach. You are almost there! Perhaps another mile to go at this point.

You can hear the cars on a nearby road passing by. It made us turn around and Mike spotted two deer. The next series of photographs shows the two deer looking at us as we were looking at them. They ambled over for a second, until the sounds of other walkers shooed them away. See if you can spot their curious selves trying to discreetly peer at us from the bushes.

Of course, the deer wasn’t the only cool wildlife present. We saw hawks circling above us in search of bunny rabbits, or so I gander. A banana slug or two made me jump in surprise. A few colorful mushrooms popped out of the forest floor, and even a beautiful lone flower said hello on our walk home.

Once in a while, do look back. This is a photograph I snatched after realizing that behind me lay a bundle of rocks hidden in the hills. We finally arrived at Stinson Beach after 2.5 hours of walking. To be frank, we were going at a relaxed pace, stopping every so often to snap photographs and observe the wildlife. At Stinson, we ate at Parkside Cafe, which I would highly recommend. We walked to the beach and stepped into a few tiny shops before heading back.

On the way back, I would cross the 4th bridge back into Muir Woods and walk the wooden boardwalks within the park. If your legs have it in them, I would recommend some of the side paths to the east of the park. Please do take note, if you are trying to catch the gift shop, they close earlier than the park does and I would recommend getting back by 3pm to check out the souvenirs by the entrance. We were hoping to snag one for Mike’s mom’s birthday but we returned to the entrance a little after 4pm, which is right when the gift shop closed. You can always return to the eastern trails (which are fairly short) until the park closes (around 5pm).

Overall, this was one of our top five day hikes that we have ever done. There’s a lot to see and experience, and the terrain had a good mixture of everything. Now that we’ve walked Muir Woods though, I would skip the entrance fees and the parking fees next time and start on the trails elsewhere. I feel like everything in the park can be seen in one day. There are many other trailheads that have free parking and that land you in similar areas. Just make sure to arrive early enough to snag a parking spot along scenic highway!

If you enjoyed this post, subscribe to my newsletter to receive all things travel! Notifications of newly published travel guides, itineraries and tips will be delivered directly to your inbox.

Getaway House is THE Los Angeles Staycation

GetAway House Los Angeles was one of the best relaxing staycations I have ever had! This is my very honest review of the experience. I highly recommend Getaway House to anyone wanting a bit of peace and quiet from the hustle and bustle of city life.

For the average city dweller, daily living can feel a bit too connected at times. Even after months of isolation and quarantine, I still yearn for more air. Inhabiting a live-work loft in the middle of a busy downtown street has its quirks. Our lives are interwoven with the thrumming of daily activity; Cars honking at the corner stop sign, music blaring at the neighboring bar, sirens wailing in the distance, and ding-dongs hanging in the air after ditchers have made a run for it. Couple that with the demands of what I now call a modern life. For example, our work tasks available 24/7 thanks to our WFH lifestyle. Even our cellphones and inboxes are buzzing! So what can urban dwellers do to escape the city’s incessant rhythm?

Book GetAway! GetAway House provides tiny “cabins” for those simply wishing to disconnect in order to reconnect. You may have seen these golden-yellow, wood-paneled container homes plastered all over Instagram.

We traded in our fast-paced city flow for a chance to float amongst the stars in the night sky. In this post, I share all that you need to know about these magical city-escape pods. Spoiler Alert: They are awesome! And just as an aside, this is not a sponsored post. We paid full price in order to try GetAway. We loved it so much that we have already made plans to do it again!

What is GetAway House?

GetAway cabins are essentially shipping containers that embody tiny home dreams come true. Well, mine anyway. The company’s focus is to provide repose to those living amidst the hustle and bustle of America’s largest cities. Escape options include Los Angeles, New York, and Washington D.C., to name a few.

Popularized on Instagram by their iconic bedside windows overlooking tree-lined cliffs and blankets of snow, it’s no wonder these “cabins” are coveted by many. GetAway beckons even the non-recluse to immerse themselves fully in nature, without the need to separate oneself from city comforts.

What To Expect In Each Getaway House Cabin

Each Getaway House cabin is furnished with a comfortable mattress, plenty of pillows and white fluffy sheets. For those who have little ones or prefer to travel in groups, bunk bed options are available. However, I really enjoyed having a single bed unit, since the bunk beds could impede the large window’s views.

The kitchenette is equipped with a small fridge, a functioning sink which provides drinkable water, an electric stove, and all the utensils and appliances needed for the most essential cooking.

There are also provisions for purchase on site. These include tea, coffee, hot chocolate, and a sustenance box made up of pasta, soup, oatmeal, cookies, and beef jerky. The sustenance box costs $30 and is perfect for those who wish to bring the most minimalist of essentials. For the more frugal, I would recommend bringing your own food items.

Each GetAway House cabins also comes with a full bathroom. The camping averse will be excited to learn that there is a flushable toilet and a stand-in shower that spits out hot water, with good pressure to boot! They provide all the necessary textiles as well as biodegradable body wash, shampoo and conditioner. In order to protect the environment, they request using only biodegradable products during your stay.

Lastly, the cabins have a bench, small desk, and chair – enough space to perform all sorts of activities. Having thought of it all, GetAway provides plenty of activities for their guests. In the cabin are reading materials, a lamp, outlets with USB charging stations, playing cards, and a pamphlet full of ideas.

We were able to lay out a 500-piece puzzle, as well as eat our meals comfortably on the table. Those hoping to get away and write have an inspiring view of the outdoors while sitting on a writer’s desk. There is even a cellphone lockbox, to help keep phone addicts disconnected thus allowing for more introspection and rejuvenation.

Other Things To Look Forward To

Outside each cabin is a picnic table and two deck chairs looking out over the mountainside. There is a fire pit, however, California had a state-wide fire ban in effect during our stay so we were not able to roast marshmallows over an open fire. When the fire ban is not in place, Los Angelenos can grill veggies and meat and gather with loved ones outdoors. We tried our best to sit on the deck chairs in the middle of winter with mugs of tea in hand, but the air was still cold. One tip I would tell guests is to bring a warm blanket, for star gazing and lounging around in the late evenings.

As much as we avoided the outdoors after sun down, we were frolicking in the wild during the day time. GetAway Los Angeles provided a list of nearby hikes to try, and we were very pleased with their suggestions. We took an especially long, 5-mile trek in Lake Arrowhead called Pinnacles Trail which took us through desert lands and had us clambering up boulders to its peak.

We balanced it out the next day by meandering along the Heaps Peaks Arboretum’s 0.8-mile loop in search of bobcats.

On the campground itself, there was a beautiful 2-mile nature walk for the taking. Since it was winter time, we had the pleasure of traipsing through snow on a bright, crisp March morning. Canine companions are allowed in the GetAway cabins for a small additional fee, and we saw many dogs walking excitedly in the area. Unfortunately, we could not bring Theo along since feline friends are currently not allowed, but I was okay with it since it allowed us the freedom to do more activities.

For those who are worried about the weather, there is an AC unit and a heater in each GetAway home. We stared at the snow outside cuddling in the warmth of our space. As much as I loved the sunshine, my favorite times were those evenings. Watching stars move across the night sky whilst wedged against the glass window pane underneath warm sheets was seriously otherworldly. I woke up several times at night just to stare at the sky and spot movements in this vast universe I call home. Our little hide-away boxcar was so comfortable and relaxing, I truly did not want to leave.

Is GetAway Worth It?

Nothing compares to my experience at GetAway in terms of unplugging from daily activity and finding true isolation – the kind that doesn’t leave you feeling lonely. It was worth every daily struggle, every waking moment, every penny spent – and I don’t say that often.

It’s ironic, really, that every time I disconnect from daily life, the more grounded I become. I think more people need to incorporate some sort of unplugging habit into their life – whether that’s dedicating one day a week free from screen time or creating limits on social media apps. It really does affect my overall happiness. Creating boundaries for myself is now more crucial than ever. I love that GetAway provides that physical boundary that is so essential to disconnecting.

Making Getting Away a Habit

If you want to make getting away a habit, you most certainly can. GetAway House has a Getaway Often Club, and I definitely aim to be a part of it. After booking seven nights, you receive credit for one free night. Make your first booking with my referral link and receive $25 OFF your first stay (minimum two nights required, but you’ll thank your lucky stars for it!). Every friend who has experienced GetAway has told me they can’t wait to do it again. What can I say? The mountains, they are calling.

If you enjoyed this post, subscribe to my newsletter to receive all things travel! Notifications of newly published travel guides, itineraries and tips will be delivered directly to your inbox.